Saturday, October 22, 2016

Make Big Acorns For Fall

You will never guess what these BIG acorns were before.

Ready? Oversize plastic Easter eggs from the Dollar Store!


When I saw this Pin way back in 2012, I knew I had to make them.


Following the Pin to its source I saw that the blogger used plastic Easter eggs! This is my kind of creative recycling: making something clever out of something else.


I decided to use these oversize Dollar Store eggs from my stash.
 First, I painted them brown with craft paint.


 I hot glued the eggs closed then wrapped them in burlap scraps. I pleated the burlap around the egg and used hot glue all the way around to secure it. Then I deconstructed a pine cone and used it for the top and added a twig stem. Cute!

But that first one  didn't look quite right to me, so I tried this....


I used the two rounded ends and glued them together. 
Already this looks more like a natural acorn shape.
Instead of the pine cone petals, I used hemp garden twine and hot glue.


Hemp twine hot glued round and round the top until I had the plump acorn look I wanted. 
A little twig adds to the finished acorn.

By George, I think I've got it!


You could also use the regular size plastic eggs but I wanted BIIIIG acorns, so I used the big ones.

Now I'm remembering those HUGE eggs for panty hose and wondering where I can get some. Now THAT would be a statement acorn. LOL!

Thursday, October 6, 2016

Make Spooky Floaty Bats for Halloween Decor


I wanted to make black bats that would float and drift around in the October breezes but I couldn't figure out how to hang them. Then I got the idea to put them on curly wires instead!

I LOVE how they came out!


I found that I had these black foam meat trays in my stash. 
After running them through the dishwasher, I knew I 
could use them for something and they were perfect
 for these flighty bats.


I drew a simple pattern and cut them out with a razor knife.

We cut long lengths of sturdy wire and curled them around a broom handle
 then wrapped one end around a foam bat shape.


We stuck them into our deck planters to see how they looked in the wind. 
We were so pleased when even the slightest breeze made them turn and twist and shiver!

So we made more and attached them to our Halloween archway.


They look great!

Not only were they fun and easy to make, but they are 100% weatherproof 
and easy to store for next year. 

That's a win win in my book!

Halloween Decor From Video Tape and Trash Bags


Here is my Halloween porch, chock full of fun and CHEAP decor ideas.
 I have a few pieces I keep from year to year, like the pumpkin lights 
and the painted signs, but most of my 
Halloween look is made out of old VCR tapes and trash bags.

Dollar Store, here I come!


The big fat orange pumpkins are Halloween trash bags filled with crumpled newspaper. So easy to do  and so easy to store. But they aren't the real surprise here.


These spooky flyaway torn "curtains" are the most fun part of this decor,
 and I made them from black trash bags cut to open all the seams
 then cut in strips for creepy flyaway curtains.

The Welding Man set up a simple archway with scrap lumber 
and I stapled lots of black plastic strips all over. 
My grandkids made the sign out of twigs and an old board.

I LOVE how they look when the wind blows!


Then we took a couple of old VCR tapes and stripped them loose from their cases so we could do THIS!

You'll need at least one more person to make this giant web 
and the results are so worth it!

We did the horizontal stringers first then wrapped 
the vertical stringers last. 
We wrapped each joint with black electrical tape and
 stood back for the finishing touch.

Every giant spider web needs a giant spider.


We filled two black trash bags with more crumpled newspaper then wired them
 in place on our garden arch. We attached long pieces of strong wire
 and bent them into leg shapes then wrapped them with strips
 of black plastic and electrical tape.

The eyes and fangs are red felt.

So cool!


On the left side of the photo you can see the start of another huge spider web.
We had fun doing this and it was so easy and 
CHEAP!

On another post I'll show how I made the easy and cheap but 
still creepy and floaty black bats. 
I'll link it up right here.....


Monday, September 26, 2016

Is That Chair Leather? No, It's Painted Fabric!!

This chair really looks like fine red leather. But it's not.


I painted the upholstery on this chair then sanded it to make it into this beautiful red piece that feels soft as suede and totally perks up my living room.


Here she is at the start. The local St. Vincent store had two of these chairs but I only needed one. I am now KICKING MYSELF for not buying both!

The frame and fabric were in excellent condition. Very tight joints, comfortable seat. I figured I could re upholster it or...as my Pinterest board says, 

Paint That Chair!

I won't do a tutorial since the DIY info is all over the web. Literally....videos, Martha Stewart, Better Homes & Gardens, HGTV, Hometalk!

I decided to use acrylic paint in bright red and liquid textile medium. I mixed two parts paint to one part textile medium. I used a full 8 ounce bottle of craft paint and 4 ounces of the textile medium and mixed them well.

Then I sprayed the fabric with water in a spray bottle (mixed with a bit of fabric softener). I dampened each area just before I painted it using chip brushes. I also masked the wooden areas.
I painted on my back deck on a 90 degree day. Excellent light and weather for painting! But I have to tell you ladies, even after multiple coats I was feeling very very iffy on this project.

Very iffy. 

I was already calculating if I had enough red fabric in my stash to go ahead and re upholster this chair, I was very undecided about the appearance.


And then after three coats the fabric started looking pretty good. 
Lovely color retention, really good texture of the original woven pattern and 
I was using less and less paint for each layer. 

Of course, I let each coat dry for an hour in the hot sun before adding the next coat.


Urg. Here's what I used. 

I know most blogs have neat photos and a concise list of brand name products plus links for purchasing, but I was ready to PAINT so I just dove right in. 

I didn't buy anything since I already had it all in my stash.

Ahem.


Here's the painted and sanded fabric up close. 
It looks just like leather and after sanding it feels like a very soft and sumptuous suede. 

I am totally pleased with the way this project turned out!


I cleaned the wood with Murphy's Oil Soap then polished
 it up with Olde English lemon oil polish.

And the paint does NOT rub off.
Even if you are wearing white jeans as a test.

This was totally worth the time and money to get myself
 a bright and comfy chair for our living room.

Would I do it again? YES!

Thursday, June 2, 2016

Pallet Wood Planter Covers Part 2


One of my post popular posts this last year was this DIY using pallet boards to cover black plastic nursery pots.

 I LOVE the way they came out!


Here's the link to part 1....


And here is what we did to finish them off and how they look filled to overflowing with flowers and plants. 


These are the type of planters we get at our local tree nursery. The smallest we used for this project are about 10 gallon size and the largest are about 25 gallon size. The big ones measure about 24" across the top.


We did not sand the boards. We just cut them to length. On the bigger planters we wedged each board under the top rim then used the brad nailer to attach each board.

We also spaced the boards closer together at the bottom than the top to allow for the taper in the planters.


Here is one of the biggest 25 gallon planters. It took a bit of finagling and mitering, but The Welding Man added a nice, neat frame to the top rim. It finishes it off quite nicely!


I like the natural wood look but on a whim added a bit of dry brushing with the trim color from our deck. The Walker's Low Catmint fills this pot to overflowing with purple flowers all summer long.

I like it alot!


Here is a comparison of natural wood and dry brushed planters. For my garden I prefer the painted look!


I checked online on the expected longevity of these plastic pots. Since they are made for commercial nurseries they have a high UV tolerance rating. They are made to last for years. That is good to know.

We have several more pots and a bunch of pallets ready for more planters. I've already bought new rosebushes so we better get to it.

And the best thing about this project? The plastic planters are less than $6 each, even for the biggest ones.

Sunday, May 29, 2016

Three D Effect With Hot Glue


I had this idea of adding a raised, three dimensional design on a glass vase and kept wondering just how could I do it?


I wanted it to be simple and quick and, of course, cheap. I also wanted to use supplies that I or just about anyone out in DIY land had in their craft stash. Here's the list of things I used...

Use hot glue, tissue paper, Mod Podge (or school glue) and craft paint to turn a plain Dollar Store vase into a unique decor item.

Here is how I-


 For my first design I chose a simple fleur de lis shape and drew it on plain paper. 
You could also print out the shape you choose.

Tape it INSIDE the container you are decorating.


Fill in that shape with hot glue. Be generous and fill it in completely.

 Do not worry about being too precise or getting all the lines exactly so. 
This process actually looks better if it is not too exact, because next you will be
 adding texture to the entire outside surface of the vase.

Melt any glue strings that are hanging off your design with a heat gun or hair dryer.


Tear the tissue paper in irregular shapes and crumple tightly, 
then smooth out. Have your stack of tissue
 ready for the next step.


Working on the 3 dimensional design first, brush a generous coat of glue or Mod Podge on top of it. Carefully lay the tissue over the design and gently coax the tissue into the edges and details with a soft brush. Brush more glue on top. Go slowly and carefully so you do not tear the tissue.
If it does tear, just smooth it down with your brush and place another piece over the tear.

Glue tissue over the entire outside surface of the vase, including
 folded over the top lip by about an inch and down around the bottom.

I let it sit overnight until it is completely dry. The glue or Mod Podge 
will dry to a hard surface on the glass with really interesting textures.


Next, use acrylic craft paint for the base color of your vase. 
I used Country White which has a buttery hue.

Cover all of the tissue paper and let it dry completely.


And now, the final step to bring out all that great texture and really make
 that 3 dimensional design pop. Dip your paintbrush in black craft paint
 and wipe off most of the paint on a rag or paper towel so your brush is almost dry. 

Gently drag the contrast color over your design.
 Go slowly and add more if you want the design to stand out.

 If you add too much contrast you can touch it up with your base color. 
Dry brush your contrast color over all the edges...
top rim, bottom edge and every little crease and crinkle of textured tissue paper.

And VOILA! You've turned a plain jane vase into a great looking decor piece!

Remember, this decorated vase should be wiped down only, never immersed in water or even run through the dishwasher. The paint, glue and paper will come loose.

You could do roses, monograms, cartoons, logos and Halloween skulls. 
The possibilities are endless.

AND, you probably have everything you need already in your craft stash!

Saturday, May 28, 2016

Yeah, I Spray Painted My Rug

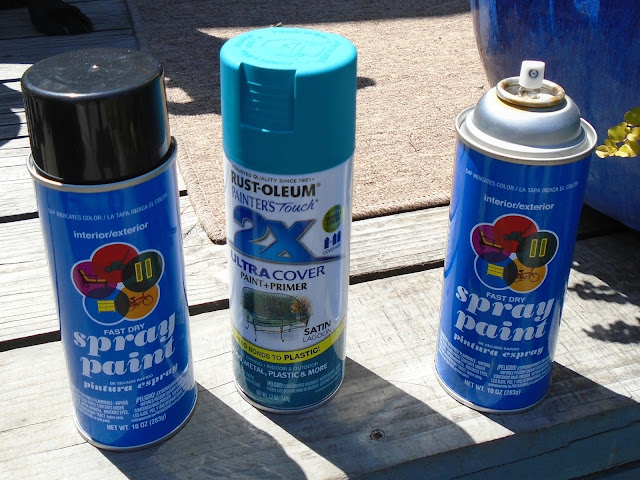
So...here's my front deck in the middle of the warm weather fix up. I spray painted the plastic chairs a bright turquoise and found a boring tan rug for $20.
Good start.


I figured I could paint that blah rug as so many others have done on Pinterest, Hometalk, Design Sponge, Apartment Therapy....

I thought maybe multicolored stripes....or chevrons...or a pretty paisley stencil...or even FLOWERS!!! 

But what?
All of those ideas require precision measuring, detailed 
placement of yards of painters masking tape and hours of work.

That's enough of that noise. 
I figured I had two, maybe three days of really nice weather 
for this project but no painters tape or pretty stencil.

So today I just went for it.


What I DO HAVE are a 16" pizza cardboard, a Dollar Store plate and a leftover saucer. 

Hmmmm, the idea is coming together.


I also have cheap Walmart paint in flat black and white
 PLUS the bright turquoise spray paint I used on the chairs.


I figured, just do it.
It's a $20 rug. 
At least it won't be boring anymore.

Here's a tip-wipe the edges of the saucer and plate
(or whatever you choose to use) after each spray
 to avoid getting the wet paint from a previous color making
 a "drip ring" on your work.


Hey, I like this alot!


This is not chocolate pudding, ice cream or cake batter. It is craft paint to 
touch up the brown spray paint which disappointed me. 

But hey, I still like the way this rug looks!


No more BORING tan rug!


This was quick and easy and turned out even better than I pictured in my head!

And I didn't have to spend a dime for this project since I had everything I needed already.
I call that a win win!!


Book Page Christmas DIY

Most of you have figured out I am a color freak with an obsession  for turquoise, red and cobalt blue.  However, I also obsess about ...