Friday, May 25, 2012

Clever and Pretty Craft Containers....


...using Dollar Store adhesive shelf vinyl (or, contact paper).


In my craft studio I use lots of black and white prints along with recycled book pages and the colors red and turquoise. This is my happy, creative place!


A year ago for my ladder shelf I covered one box with Dollar Store contact paper in a neat black and white print. I had enough to do a few boxes but when I went back to the store they didn't have it anymore. Bummer. I kept checking back and finally this week they had it in stock again. Score!


I had been using this unadorned creamer container to corral the scraps on my work table, but with the new contact paper I styled it up, baby!


Oooh aaah!


And of course I didn't stop there. From left to right...the creamer can, a Starbucks bottle, an alfredo sauce jar and a mayonnaise bottle. Don't they look pretty with that contact paper and some lace and rosettes?


These bright red coffee containers were perfect for my studio, except for those ugly, pesky labels. With my Dollar Store contact paper I jazzed them up in a hurry. I have some more jars and bottles and even a vase and possibly a metal coffee can....good thing I bought an extra roll of contact paper.

I love it when I find a design element that works so well for my decor and it makes the already practical containers pretty, too. And it's cheap! Can't beat that.

Gotta link this up to the fun parties in my sidebar. Come visit and link up, too. It's a fun and creative way to spend some time!

Save That Sweatshirt With Paint


I love my zippered hoody sweatshirts and wear one almost every day. Unfortunately, that means they are going to get stained with paint and sometimes bleach. So what to do? Paint a design on them to hide the mess and style 'em up at the same time!


Yup, this black one had white and blue paint AND bleach spots on it. No problem! I added the script and the dotted design and saved it.


And my grandson gives me his sweatshirts as he outgrows them. This dark grey one had a cool design that was almost worn out. This is what it looks like now that I've rescued it with paint.


And here is what it looked like before I worked on it. The light grey design was almost gone and it just looked worn out and grungy. Tho I understand, grunge is the new black, according to my grandson. Lol!


I used Patio Paint in silver metallic. See where I've started free form painting the cross design? Patio Paint metallics are the absolute shiniest craft paint out there and with a bit of fabric medium work perfectly for this project and others. The metallics come in gold, copper and silver and I love their durable shine!

Here is the front detail repainted. Love this!


On back I added curlicues and a flower, plus I redid some lettering to read "Mom." I didn't go for perfect coverage and kept the paint a bit blotchy as I worked on the design. I really like how it's come out and the silver really picks up the light!


On the black sweatshirt I used this pre cut stencil and chose which phrases and words I wanted. I added fabric medium to the plain white craft paint and pounced it on with a makeup sponge. Easy peasy!

And here is the link to the stencil page at  The Crafters Workshop, the company which makes this fun stencil. They have LOTS of cool designs.

http://thecraftersworkshop.com/The_Crafters_Workshop/New_Products.html


This says, "Art is just another way of expressing our innermost thoughts." Down the left sleeve I stenciled "today," "yesterday" and "tomorrow." I hope you can see the blue highlights I added to "Art." Then I added dotted swirls in white and blue plus some free form fireworks type flowers on the front and pockets. I really like how this design came out! Best of all, you can't see the bleach or paint stains on this sweatshirt anymore! :o)

UPDATE...I just washed this black sweatshirt with my regular laundry. I zipped it up and turned it inside out  and just let her rip, figuring if it held up to a normal wash it would be okay. It came out of the dryer unscathed and the paint is even a bit softer to the touch after laundering. Gotta love that.

Now I'm thinking of doing this to a new sweatshirt and see just what designs I can come up with. I remember way back when guys used lace to stencil designs on their cars. What if I did that on a sweatshirt using layered laces and appliques? Hmmm, now my brain is working on more ideas.

I'll be linking up to the parties in my sidebar. Come visit and join up. You'll have a fun time!

Saturday, May 5, 2012

Birthday Gift in a Deli Tray


The family knows when birthdays roll around they are going to get a hand made gift. They even request what they want. And May is chock full of gifting occasions, with birthdays for my three girls (Christy, Kelly and Katy) and my younger sister (Dianne)...plus Mother's Day. Buying gifts for everyone would be hard on the wallet!

So, for my daughter, Kelly, the scrapbooking, cardmaking, senior and prom photo taking impresario of the family, I knew that scrapbook embellishments and trims would be the perfect gift. Also, she asked for them :o)


I started out making ribbon and fabric rosettes with hot glue on punched card stock circles. I even made a few with scraps from a Tiffany blue bridesmaid dress I sewed for her a few years back.

I usually hand sew all my rosettes but since these were for scrapping and card making, hot gluing was fast and easy. Also, fun!


I made LOTS of rosettes.


And I made more!

Then I made yo yos, and melted fabric flowers and twine discs and a twine daisy and ruffles out of crepe paper and strips of fabric and even some white satin roses like the 37 I sewed for her wedding dress 20 years ago. Why 37? Because even tho the pattern called for 50 rolled satin roses, I stopped at 37...because that's a lot of rolled satin roses and I was pooped, that's why.

The dress, by the way, was GORGEOUS. You never even noticed it had fewer flowers. That's the story and we're all stickin' to it.


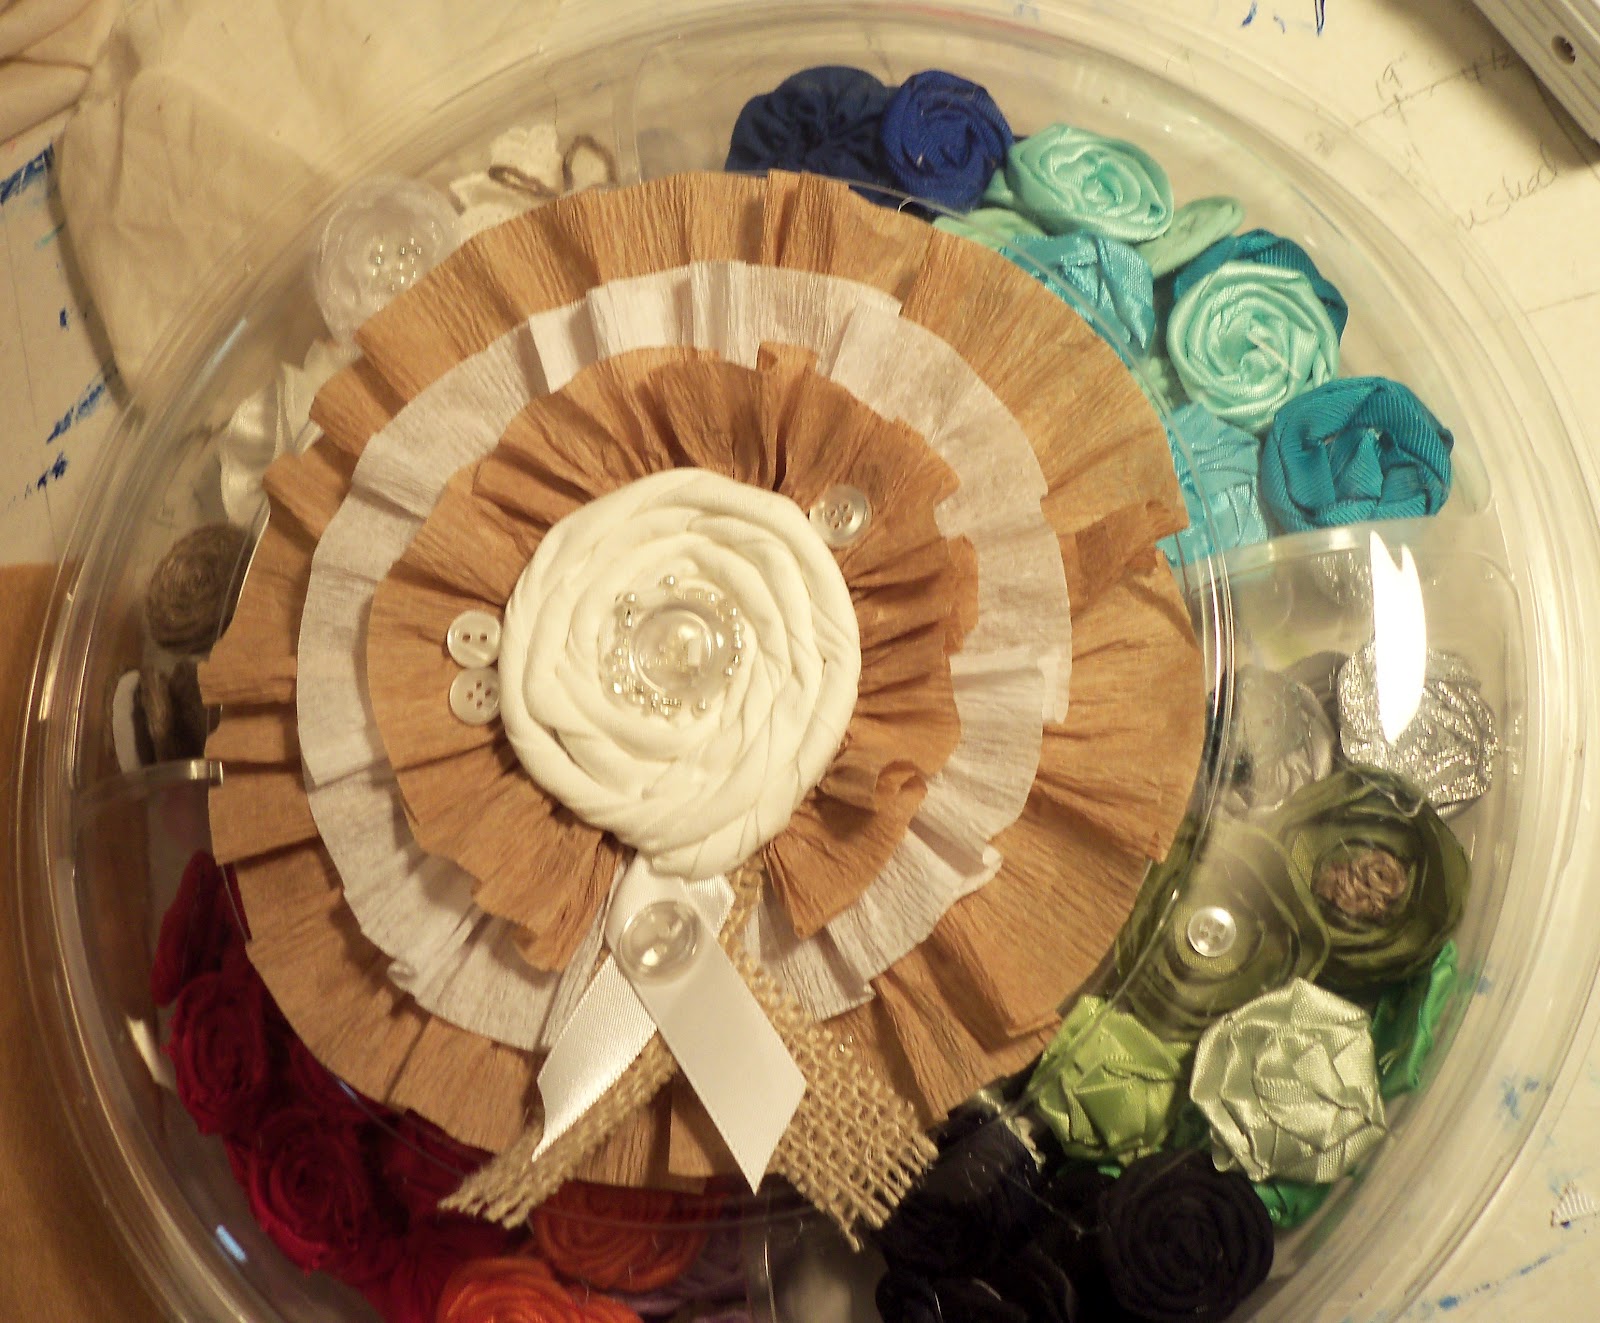
Then I was casting about for a cool way to package these cool flowers and trims. I tried putting them in a big jar but it looked cluttered and chaotic. Part of the impact of a good gift is PRESENTATION, baby! Then I remembered this clear plastic deli tray I'd saved from a family picnic. SCORE!


I must have loaded and reloaded and rearranged that deli tray four or five times. I put the ruffled trims in the center with a package of flat lace tied with twine as a divider. It was twice this full when I got everything arranged just so.


I snapped the dome top in place and realized I had to cover the printed label. So with a bit more ruffled crepe paper and a rolled rosette with a button and bead center and more buttons around edges and a bit of burlap and a satin ribbon...okay, time to stop!

Does anyone else have that small problem? Lol


And here's something sweet. Here are two extra melty edge and beaded flowers that Insanely Creative Christy made for Prom. Whose Prom? Kelly's daughter, Rebecca's, Prom.

Becca wanted to wear that same bridesmaid dress I made for her mother, with a few additions. Like sheer caplet tulle straps. And lacing up the back. AND melty edge and beaded flowers made by her Aunt Christy!


Memories and nostalgia win in our family every time! The dress came out nicely and Rebecca loved the family story that came with it.

And Kelly? After she was done smiling and weeping over her daughter's first Prom and ripping into her Deli Tray birthday present, she went straight to work on this....


The Prom layout from Christy's daughter's Senior Year in 2010. It's not done yet, she says. She's got the ruffled crepe paper trim in place and that rolled satin rose and the kickin' pic of those beautiful girls....

And since today is National Scrapbooking Day, she's got lots of plans for the rest of her birthday gift. Ahem, "Her Deli Tray Birthday Gift!"

So what have you repurposed for a special occasion? Cake platter, jewelry box, recycled mailing boxes, pizza box? Come on ladies, tell!

I'm posting on the link parties in my sidebar, come visit and share some creative love.


Book Page Christmas DIY

Most of you have figured out I am a color freak with an obsession  for turquoise, red and cobalt blue.  However, I also obsess about ...